Glassware
The Importance of Cleaning Your Lab's Pestle and Mortar
Sep 01 2022
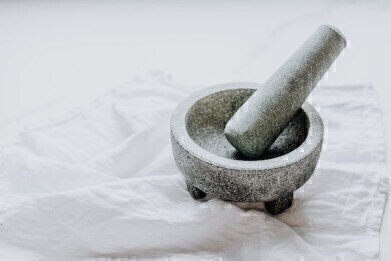
More than just a kitchen utensil, a pestle and mortar is a staple in most scientific laboratories. Made from durable materials, they’re used to grind components, samples and specimens into granular particles. Cleaning is an important step as a soiled pestle and mortar can compromise the accuracy of results and the safety of laboratory personnel.
Like glassware, cleaning laboratory pestle and mortars requires a specialised approach. Without the right cleaning steps, they can become a major source of contamination.
Applications for laboratory pestle and mortars
Before we dive into best-practice cleaning protocols, let’s take a closer look at how pestle and mortars are used in the laboratory.
-
Accelerate reaction rates of solutes
Increasing surface area can significantly accelerate the reaction rates of solutes such as solid-state chemicals. This makes it easier for the chemicals to dissolve when added to a solution.
-
Breaking solids into smaller particles
Many laboratories rely on liquid solutions to carry out experiments. Pestle and mortars are a quick, easy and safe way to break solids into smaller particles. Depending on the texture required, solids can be ground into smaller fragments or a fine powder or paste.
How to clean laboratory pestle and mortars
To minimise the risk of cross contamination, the following steps can be used to clean laboratory pestle and mortars:
-
Remove particles and debris
Most laboratory pestle and mortar cleaning protocols start with particle removal. Use a wire brush or clean towel to loosen debris and remove particles. This is an important step as previously used particles may react with water.
-
Clean with hot soapy water
After debris has been removed, use hot soapy water to clean the pestle ad mortar. Ideally, choose a fragrance-free soap for this step.
-
Allow to air dry
Place on a clean rack and allow to air dry.
-
Rinse with isopropyl alcohol
After drying, rinse with isopropyl alcohol to remove excess dirt and dust. This preps the pestle and mortar for future use.
-
Rinse with hot sulfuric acid
For biochemistry applications, a rinse with hot sulphuric acid may be necessary to remove all remaining traces of chemicals and other contaminants.
-
Wash with diluted sodium bicarbonate
The hot sulphuric acid step can be followed with an additional wash using diluted sodium bicarbonate.
-
Rinse with deionised water
Conclude with a rinse in deionised water.
-
Bake for 30 minutes
Bake for half an hour at 110°C in a laboratory oven.
Find out more about gold-standard cleaning practices for other lab equipment and utensils, including glassware and pipettes in ‘Laboratory Hygiene - A Comprehensive Guide’.
Digital Edition
Lab Asia Dec 2025
December 2025
Chromatography Articles- Cutting-edge sample preparation tools help laboratories to stay ahead of the curveMass Spectrometry & Spectroscopy Articles- Unlocking the complexity of metabolomics: Pushi...
View all digital editions
Events
Jan 21 2026 Tokyo, Japan
Jan 28 2026 Tokyo, Japan
Jan 29 2026 New Delhi, India
Feb 07 2026 Boston, MA, USA
Asia Pharma Expo/Asia Lab Expo
Feb 12 2026 Dhaka, Bangladesh
